Table of Contents
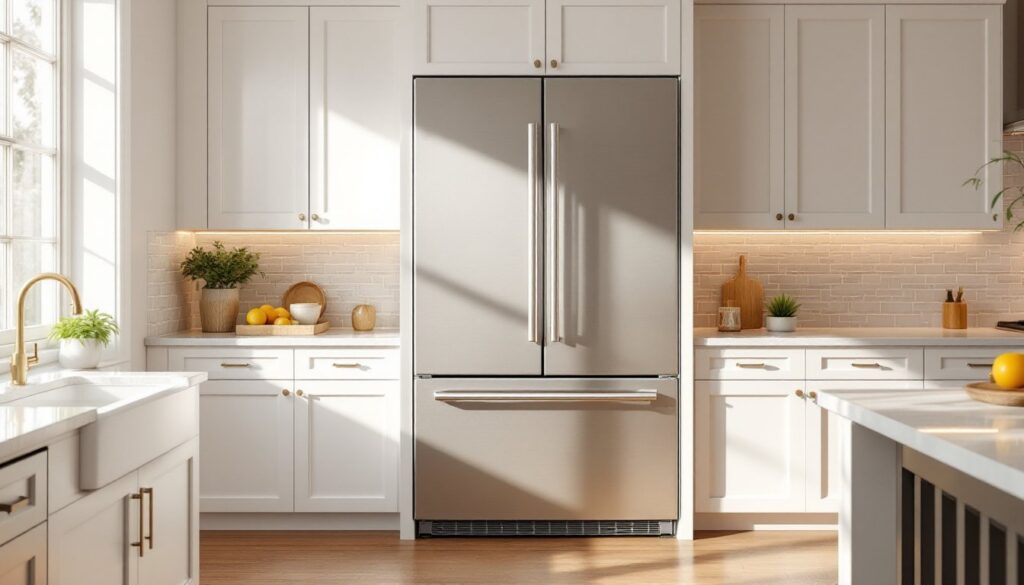
ToggleWhen an LG refrigerator starts acting up, replacement parts are often the quickest path to getting it running again without shelling out for a service call. Whether it’s a faulty water filter, a worn gasket letting cold air escape, or a broken ice maker component, most homeowners can handle straightforward part replacements with basic tools and a little patience. This guide walks through the most failure-prone components, where to source quality replacements, how to match parts to your specific model, and what tools you’ll need to do the work safely. With LG holding a significant share of the appliance market, understanding which parts fail, and how to swap them, can save hundreds in repair bills.
Key Takeaways
- Water filters, door gaskets, and ice maker components are the most commonly replaced LG refrigerator parts, and swapping them yourself can save hundreds in service call fees.
- LG refrigerator parts fail from wear, temperature stress, and mechanical strain, with door seals, water filters, and ice makers requiring replacement every six months to a few years depending on usage.
- Genuine OEM parts from LG’s authorized distributors carry warranties and performance guarantees, while aftermarket options like NSF-certified water filters can save 30–50% if quality and dimensions match your model.
- Always locate your LG model number on the interior label and use the parts lookup tool to identify the exact replacement part before ordering, as part numbers vary widely across LG’s product lines.
- DIY repairs for water filters, gaskets, handles, and basic electrical components require only basic tools and take an afternoon, but sealed system work and compressor issues demand a licensed technician due to EPA refrigerant regulations.
- Unplug the refrigerator before any work, turn off the water supply before disconnecting lines, and avoid the sealed refrigeration system unless you’re qualified to handle refrigerant recovery.
Why LG Refrigerator Parts Fail and When to Replace Them
Refrigerator components wear out from constant cycling, temperature swings, and mechanical stress. Door seals compress and crack after years of opening and closing, which lets warm air infiltrate and forces the compressor to work overtime. Water filters clog with sediment and lose effectiveness after six months, even if the indicator light hasn’t triggered. Ice maker assemblies jam or leak when mineral deposits build up or plastic gears strip under load.
Electrical components like thermostats, defrost heaters, and fan motors fail from power surges, moisture exposure, or simple age. LG models built between 2016 and 2021 saw a higher-than-average failure rate in linear compressors, which prompted extended warranties and class-action attention, though compressor replacement typically requires a licensed technician due to refrigerant handling regulations under EPA Section 608.
Know when to DIY and when to call a pro. Replacing a water filter, door handle, or gasket is straightforward. Swapping a defrost timer or thermostat requires basic electrical work and a multimeter for continuity testing. Anything involving the sealed refrigeration system, compressor, evaporator coil, refrigerant lines, demands a licensed HVAC tech and proper recovery equipment. If your LG is under five years old and experiencing cooling issues, check warranty coverage before ordering parts.
Most Commonly Replaced LG Refrigerator Parts
Certain components see more action, and more failures, than others. Focusing on these high-wear parts helps you diagnose problems faster and keep spares on hand if you rely heavily on your fridge.
Water Filters and Dispenser Components
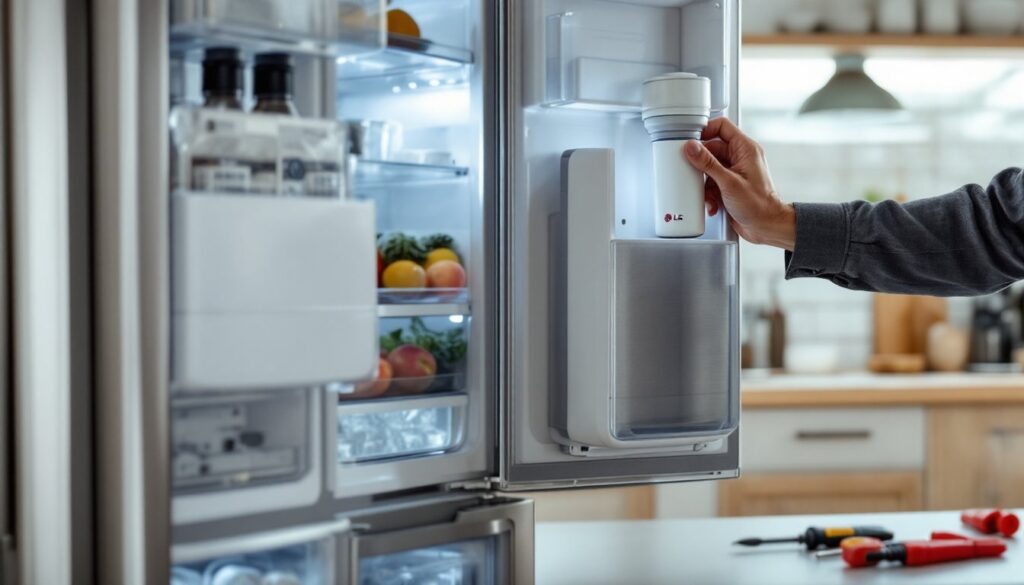
Water filters (LG part numbers LT1000P, LT800P, LT120F, and ADQ74793501 are common) should be swapped every six months or after filtering roughly 200 gallons, whichever comes first. Even if water flow seems fine, filter media degrades and can harbor bacteria. Look for NSF-certified replacements that meet NSF/ANSI Standard 42 (aesthetic) and Standard 53 (health effects).
Dispenser actuators and water inlet valves fail when mineral deposits clog the solenoid or when plastic levers crack. If water dispenses slowly or not at all, and you’ve already replaced the filter, the inlet valve is the likely culprit. It’s located at the back lower panel and requires shutting off the water supply line before removal. Test the valve’s solenoid with a multimeter set to ohms: a reading far from the manufacturer’s spec (usually 500–1,500 ohms) means it’s dead.
Ice maker fill tubes freeze over or crack, especially in models with the ice maker mounted in the door. If ice production stops or you see water pooling inside the freezer, inspect the fill tube for cracks or ice blockages. A heat gun on low setting can thaw frozen tubes, but cracked tubes need replacement to prevent leaks.
Door Seals, Gaskets, and Handles
Door gaskets (also called door seals) are magnetic rubber strips that line the perimeter of fridge and freezer doors. They’re the #1 cause of poor cooling and frost buildup when they fail. Test seal integrity by closing the door on a dollar bill: if you can pull it out easily, the gasket isn’t sealing. Gaskets become brittle and tear from exposure to grease, food residue, and UV light (if your fridge gets direct sun).
Replacing a gasket takes about 30 minutes. Order the part by your model number, gaskets are not universal. Most LG gaskets are held in place by a retainer strip secured with hex screws. Loosen (don’t remove) the screws, pull out the old gasket, slide in the new one, and retighten. Let the new gasket sit at room temperature for an hour before installation so it’s pliable and seats properly.
Door handles crack or pull loose from repeated force. LG uses a mix of threaded-bolt and push-clip mounting systems depending on the model. Replacement handles come with new hardware: check your model’s parts diagram to confirm mounting style. For French-door models, handles often share a center support bracket that can also crack, inspect the bracket when replacing handles.
Where to Buy Genuine LG Refrigerator Parts vs. Aftermarket Alternatives
Sourcing the right part at a fair price requires weighing OEM quality against aftermarket savings, and understanding where each makes sense.
Genuine LG parts come with fit and performance guarantees but cost more. Buy direct from LG’s parts site or authorized distributors like AppliancePartsPros, PartSelect, or RepairClinic. Genuine parts carry LG’s warranty (typically 90 days on parts), which matters for expensive components like control boards ($150–$300) or compressor start relays.
Aftermarket parts can save 30–50% but vary wildly in quality. Water filters are the safest aftermarket buy, brands like Waterdrop and Pureza are NSF-certified and fit LG housings perfectly. Avoid unbranded filters from marketplaces: they may lack proper filtration and void your warranty if they cause damage. For mechanical parts like hinges, brackets, and handles, aftermarket options work fine as long as dimensions match, compare mounting hole spacing and screw sizes before ordering.
Grey-market and used parts appear on eBay and surplus sites. They’re risky for electronic components (control boards, thermostors, sensors) because you can’t verify testing or storage conditions. Professionals sometimes recommend hiring refrigerator repair services for complex diagnostics, but many DIYers successfully tackle routine part swaps.
Warranty considerations: If your LG is still under manufacturer or extended warranty, using non-OEM parts may void coverage. Check your warranty terms before ordering aftermarket. Some extended warranties from retailers explicitly require OEM parts for repairs.
How to Identify the Right Replacement Part for Your LG Model
Ordering the wrong part wastes time and money. LG produces dozens of refrigerator lines with overlapping part numbers, so exact identification is critical.
Start with your model number and serial number, both stamped on a label inside the fridge, usually on the left or right interior wall near the top, or on the ceiling. The model number looks like LFXS28968S or LMXS30776S. Write down the full string, including letters and suffix codes.
Use LG’s online parts lookup tool or third-party sites like PartSelect and SearsPartsDirect. Enter your model number and navigate to an exploded diagram of your fridge. These diagrams show every part with a numbered callout and corresponding part number. Click the component you need, verify it matches your symptoms, and note the part number.
Part number cross-referencing helps when OEM parts are backordered. Some part numbers supersede older versions, sites like AppliancePartsPros list superseded numbers and compatible alternatives. For example, part ADQ36006101 (an older ice maker assembly) may be replaced by ADQ36006102 in current stock.
Physical verification matters for universal-fit parts like shelves, bins, and light bulbs. Measure dimensions (length, width, mounting-hole spacing) and compare to product specs. For electrical components, match voltage and resistance ratings exactly, substituting a 120V, 500-ohm thermostat with a 240V unit will fry the control board.
If you’re stumped, snap a photo of the failed part and its surroundings, then contact the parts supplier’s tech support. Most can identify components from photos and confirm compatibility.
Essential Tools and Safety Tips for DIY Refrigerator Repairs
Refrigerator repairs don’t require a full shop, but having the right tools on hand makes the job safer and faster.
Basic tool kit:
- Nut driver set or socket set (1/4″ and 5/16″ hex head screws are standard on LG models)
- Phillips and flathead screwdrivers
- Needle-nose pliers for removing hose clamps and wire connectors
- Adjustable wrench for water line fittings
- Multimeter (for testing electrical continuity and voltage)
- Flashlight or headlamp (fridge interiors are dim)
- Towels and a shallow pan for catching water during filter or valve replacement
- Heat gun (optional, for thawing frozen fill tubes)
Safety first:
- Always unplug the refrigerator before removing panels or touching electrical components. Even when unplugged, capacitors in control boards can hold a charge, discharge them with an insulated screwdriver across the terminals if you’re working on the control board.
- Wear safety glasses when working overhead or drilling out rivets.
- Turn off the water supply at the shut-off valve (usually under the sink or behind the fridge) before disconnecting water lines to prevent flooding.
- Ventilate the area if you smell refrigerant (a sweet, chemical odor). Refrigerant leaks require a licensed tech and are not DIY-safe.
- Lift with help. French-door and side-by-side doors can weigh 30–50 lbs once you remove hinge pins. Have a helper support the door while you disconnect hinge bolts.
Many detailed repair walkthroughs cover troubleshooting steps for common failures, and platforms like Instructables host community-contributed repair guides with photos. Work methodically, take pictures before disassembly, and label wires if you’re removing multiple connectors.
If a repair involves the sealed system or you’re not comfortable working with 120V electrical components, call a pro. Most service calls cost $150–$250 for labor plus parts, worth it for complex diagnostics or warranty-protected repairs. But for filters, gaskets, handles, and basic electrical swaps, a DIYer with patience and the right parts can knock out the job in an afternoon.