Table of Contents
ToggleA burned-out refrigerator light might seem trivial until you’re rummaging through the crisper drawer at midnight, trying to find the salsa by feel alone. That little bulb does more heavy lifting than most homeowners realize, it’s a safety feature, a food inspection tool, and a quality-of-life upgrade you don’t appreciate until it’s gone. The good news? Replacing a Whirlpool refrigerator light bulb is one of the easiest appliance repairs you can tackle yourself, usually taking less than five minutes and requiring zero special tools. This guide walks through identifying the right replacement bulb, swapping it out safely, and troubleshooting common hiccups along the way.
Key Takeaways
- Replacing a Whirlpool refrigerator light bulb is a simple DIY repair that takes less than five minutes and requires no special tools.
- A working Whirlpool refrigerator light is essential for food safety, helping you spot spoilage and read expiration dates to prevent foodborne illness.
- LED bulbs for refrigerators cost more upfront but last 15–20 years and generate less heat than incandescents, reducing strain on your compressor.
- Common Whirlpool refrigerator light bulb types include A15 (E26 base), T8 tubular (E17 base), and candelabra (E12), so verify your model’s specs before purchasing.
- If your replacement bulb doesn’t work, check the door switch, verify proper seating, test the bulb in another fixture, and clean the socket for corrosion before calling a technician.
- Maintain your refrigerator light by upgrading to appliance-rated LEDs, keeping the socket clean, avoiding door slamming, and never exceeding the fixture’s specified wattage.
Why Your Whirlpool Refrigerator Light Matters More Than You Think
Most folks treat the interior Whirlpool refrigerator light as an afterthought, but it serves several practical functions beyond simple visibility. A working bulb helps you spot spoiled produce before it turns into a science experiment, ensures you can read expiration dates without pulling containers into the kitchen light, and prevents accidents like spilled milk or knocked-over jars during late-night snack runs.
From a food safety standpoint, proper lighting matters. You’re less likely to miss mold on cheese or discoloration in leftovers when you can actually see what’s in there. The USDA notes that visual inspection is your first line of defense against foodborne illness, and that’s tough to do in the dark.
There’s also an energy consideration. Older incandescent bulbs generate unnecessary heat inside an appliance that’s working to stay cold, forcing the compressor to work harder. Modern LED light replacements for Whirlpool refrigerators run cooler and last significantly longer, sometimes 15–20 years under typical use. That’s one less thing on your quarterly maintenance checklist.
Finding the Right Replacement Bulb for Your Whirlpool Model
Before you head to the hardware store or order online, you need to nail down the exact Whirlpool refrigerator bulb replacement specs. The wrong size or wattage can cause fitment issues, overheating, or damage to the socket.
Start by checking your owner’s manual, it’ll list the bulb type and wattage. If you’ve lost the manual (no judgment), look for a model number sticker inside the fridge, usually on the sidewall or above the top shelf. You can download the PDF from Whirlpool’s support site using that model number.
Alternatively, pull the old bulb and check the base. You’ll see markings for bulb size (like A15 or T8) and wattage (commonly 25W, 40W, or 60W for incandescents). For LED conversions, match the base type (E26 medium screw or intermediate E17, for example) and stay within the fixture’s max wattage rating. Many newer Whirlpool models ship with appliance-rated LEDs that draw only 4–6W while producing equivalent light to a 40W incandescent.
Common Bulb Types Used in Whirlpool Refrigerators
Whirlpool uses a handful of standard configurations across their refrigerator lineup:
- A15 appliance bulb (E26 base): The most common type. Shaped like a small household bulb, typically 40W incandescent or 5W LED equivalent. Fits most top-mount and side-by-side models from the last two decades.
- T8 tubular bulb (intermediate E17 base): Found in some French door and older bottom-freezer units. Usually 25W incandescent or 3–4W LED. The narrower intermediate base is easy to confuse with the standard E26, double-check before buying.
- Candelabra base (E12): Rare but present in a few compact and undercounter Whirlpool models. Typically 15W incandescent.
- Puck or integrated LED modules: Some 2023+ models use non-replaceable LED assemblies. If yours has a flat LED panel instead of a traditional bulb socket, you’ll need a service tech or a replacement module from Whirlpool.
When in doubt, bring the old bulb to the store. Staff at home improvement centers can match it on the spot. Major appliance retailers like Bob Vila recommend keeping a spare Whirlpool refrigerator light bulb on hand so you’re not stuck mid-repair.
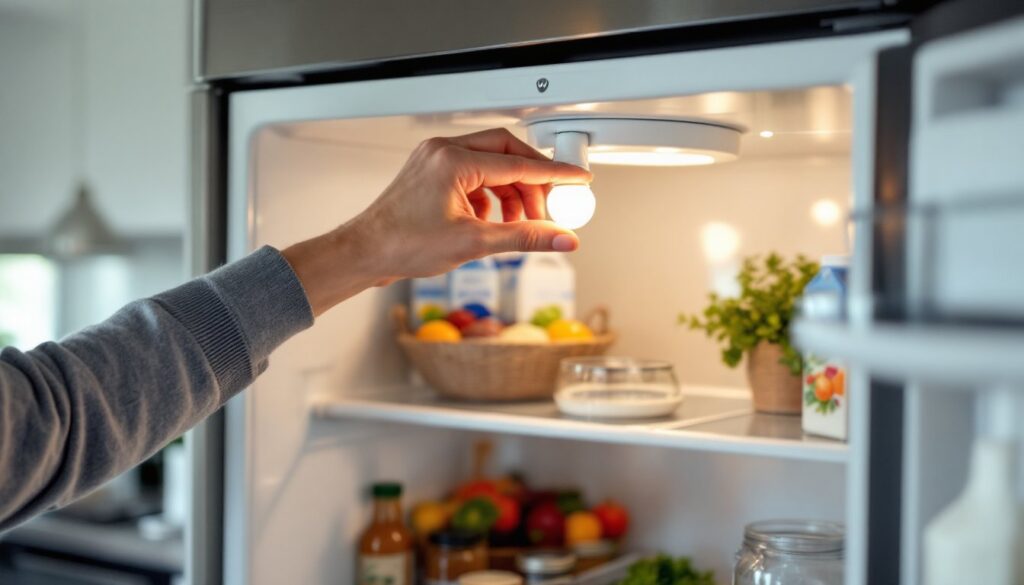
Step-by-Step Guide to Replacing Your Whirlpool Refrigerator Light Bulb
Swapping a refrigerator bulb is straightforward, but safety comes first. You’re working near water (condensation), food, and electricity, skip the shortcuts.
What you’ll need:
- Replacement bulb (appliance-rated, correct wattage and base)
- Small flathead screwdriver (if the cover is clipped)
- Dry cloth or paper towel
- Work gloves (optional, protects against broken glass)
Step 1: Unplug the refrigerator or turn off the circuit breaker. Even though you’re just touching the bulb, electrical contact is possible if the socket’s faulty. This takes 10 seconds and eliminates shock risk. If unplugging isn’t practical (built-in models), flip the breaker.
Step 2: Locate the light cover. Most Whirlpool models use a plastic lens that snaps or screws into place. Look for tabs, clips, or small screws along the edges. Some side-by-side models have a flat panel that slides out. Check your manual if it’s not obvious, forcing the wrong direction can crack the housing.
Step 3: Remove the cover. For snap-on covers, gently press the tabs inward while pulling the lens down or forward. If there are screws, use a flathead or Phillips head as needed. Set the cover and any screws aside where they won’t roll into the crisper.
Step 4: Remove the old bulb. Turn counterclockwise (lefty-loosey) until it releases. If it’s stuck from years of humidity and temperature cycling, wrap a dry cloth around it for better grip. Don’t force it, if the glass breaks, you’ll be picking shards out of the butter compartment.
Step 5: Install the new bulb. Thread it in clockwise (righty-tighty) until snug. Don’t overtighten, appliance sockets are often plastic and can crack. For LED bulbs, hand-tight is plenty.
Step 6: Reinstall the cover. Line up the tabs or screw holes and press or fasten until secure. Make sure it’s seated evenly, gaps let cold air escape and can frost over.
Step 7: Restore power and test. Plug the fridge back in or flip the breaker. Open the door and confirm the light turns on. If it doesn’t, proceed to the troubleshooting section below.
Most Whirlpool refrigerator light replacements are this simple. If your model has an integrated LED panel or requires disassembly of shelving, Family Handyman offers model-specific video walkthroughs for trickier configurations.
Troubleshooting: What to Do When the New Bulb Doesn’t Work
You’ve installed a brand-new bulb, but the Whirlpool refrigerator lights still won’t come on. Before calling a repair tech, walk through these common culprits:
Check the door switch. Most refrigerators use a plunger-style switch near the door hinge. When the door opens, the switch releases and completes the circuit. If it’s stuck in the depressed position (from a sticky buildup or mechanical failure), the light won’t turn on. Press and release it manually a few times. If it feels loose or doesn’t click, the switch may need replacement, a $10 part you can swap yourself with a screwdriver.
Verify the bulb is seated correctly. Even a quarter-turn short of full contact can break the circuit. Remove and reinstall the bulb, making sure it’s snug.
Test the bulb in another socket. Sometimes new bulbs are DOA. Pop it into a table lamp to confirm it works. If it lights up elsewhere, the problem is in the fridge’s wiring or socket.
Inspect the socket for corrosion. Moisture can cause rust or mineral buildup on the contact points. With power OFF, use a dry cloth or fine-grit sandpaper to clean the metal contacts inside the socket. Avoid getting moisture inside, let it air-dry completely before testing.
Check the circuit breaker or GFCI outlet. If the entire fridge is running but the light’s out, this is less likely, but worth confirming. Some kitchens have GFCI outlets that can trip independently.
Look for a dedicated light control or dimmer. A few high-end Whirlpool models have interior light settings in the digital control panel. Make sure it’s not turned off or dimmed to zero.
If none of these steps work, you’re likely dealing with a wiring issue inside the appliance. That’s a job for a qualified appliance repair technician. Don’t start pulling panels off a refrigerator under warranty, you’ll void coverage. According to Good Housekeeping appliance experts, refrigerator electrical faults should be handled by pros to avoid damage to the control board or compressor circuits.
Tips for Extending the Life of Your Refrigerator Light Bulb
Once you’ve got your new Whirlpool refrigerator LED light replacement or incandescent bulb installed, a few habits can help it last longer and perform better.
Upgrade to an LED appliance bulb. If your fridge still runs incandescents, swap to an LED rated for enclosed fixtures and cold temperatures. They cost a bit more upfront ($8–$15 versus $2–$4), but they last 10–15 times longer and generate almost no heat. Less heat means less stress on the socket and less work for the compressor.
Keep the socket and cover clean. Wipe down the light cover when you’re doing a monthly fridge clean. Grease, condensation, and food splatters can work their way into the socket over time, causing poor contact or corrosion.
Don’t slam the door. Sudden jarring can shorten bulb life, especially with incandescents. The filament is fragile and vibration-sensitive. LEDs handle shock better, but it’s still a good habit.
Check the door seal (gasket). A worn gasket lets warm, humid air into the fridge, causing condensation around the light fixture. Over time, this moisture can corrode the socket or cause the bulb to fail prematurely. Run the dollar-bill test: close the door on a bill, then try to pull it out. If it slides easily, the seal may need replacing.
Avoid using higher wattage than specified. It’s tempting to swap in a brighter bulb, but exceeding the fixture’s max wattage can melt the socket, damage wiring, or create a fire hazard. Stick to the specs in your owner’s manual.
By following these simple steps, most homeowners can keep their Whirlpool refrigerator light bulb running reliably for years without intervention.
Conclusion
Replacing a Whirlpool refrigerator light bulb is one of those quick wins that restores function and convenience with minimal effort. Whether you’re dealing with a burned-out incandescent or upgrading to a long-life LED, the process is safe and straightforward for any homeowner. Keep a spare bulb on hand, know your model’s specs, and you’ll never be left in the dark again.