Table of Contents
ToggleMetal wall decor has come a long way from the tin signs and wrought-iron scrollwork of decades past. Today’s metal wall art decor brings texture, dimension, and an edge of industrial sophistication to living rooms, bedrooms, entryways, and even outdoor patios. Whether someone’s working with brushed steel panels, hammered copper accents, or powder-coated geometric shapes, wall decor metal offers durability and visual impact that paint and prints can’t match. This guide walks through the types, selection process, DIY options, and proper installation techniques for anyone ready to add metalwork to their walls without hiring a decorator or blowing the budget.
Key Takeaways
- Metal wall decor offers superior durability, versatility, and low maintenance compared to canvas, prints, or wood, making it ideal for modern homes across various design styles.
- Three-dimensional sculptural pieces and geometric metal panels create visual depth and shadow play while also serving as functional design elements that break up large wall spaces.
- When selecting metal wall decor for your room, consider the existing color palette, scale (occupying 60-75% of furniture width), and finish compatibility to avoid mixing more than three metal finishes in one space.
- DIY metal projects like geometric grids, hammered copper panels, and upcycled industrial pieces are accessible with basic tools and materials sourced from metal suppliers or salvage stores.
- Proper installation requires anchoring pieces over 10 lbs into wall studs, using quality hardware like D-rings or French cleats, and ensuring level alignment for a professional appearance.
- Outdoor metal wall decor must use rust-resistant materials like aluminum or stainless steel (grade 304/316) with exterior-rated powder-coated finishes to withstand UV exposure and moisture.
Why Metal Wall Decor Is Perfect for Modern Homes
Metal wall decor checks three boxes that matter for modern interiors: durability, versatility, and low maintenance. Unlike canvas prints that fade under UV exposure or wood pieces that warp in humid climates, metal holds up. Aluminum, steel, and copper resist moisture, don’t attract pests, and won’t sag over time when properly mounted.
From a design standpoint, metal works across styles. Brushed nickel or stainless steel fits minimalist and contemporary spaces. Oxidized copper or rusted steel brings warmth to farmhouse or rustic interiors. Powder-coated finishes in matte black, navy, or burnt orange bridge the gap for eclectic or transitional rooms. The material’s reflective properties also help bounce light around darker spaces, particularly useful in north-facing rooms or basement areas.
Maintenance is minimal. A quick wipe with a microfiber cloth handles dust. For outdoor installations or high-humidity areas like bathrooms, occasional inspection for rust spots (on ferrous metals) and a coat of clear sealant keeps pieces looking fresh. That’s far less upkeep than reframing prints or refinishing wood every few years.
Cost-effectiveness plays a role too. While hand-forged artisan pieces run high, laser-cut panels and mass-produced designs offer the look at a fraction of gallery prices. DIYers can also source sheet metal and basic metalworking tools to create custom pieces, more on that later.
Popular Types of Metal Wall Art and Accents
Sculptural Metal Art and 3D Designs
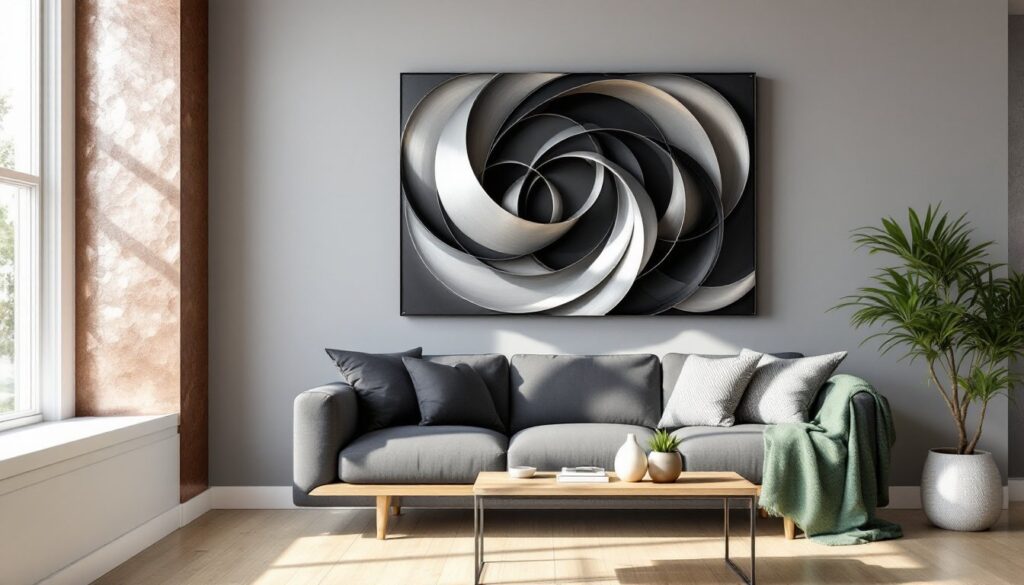
Three-dimensional metal sculptures add depth that flat art can’t achieve. These range from abstract forms, twisted ribbons of steel, starburst designs, or layered circles, to representational pieces like trees, animals, or cityscapes. The key advantage is shadow play: as natural or artificial light shifts throughout the day, the piece changes character.
Common materials include powder-coated steel (for indoor use), aluminum (lightweight, good for large pieces), and wrought iron (heavier, traditional look). Thickness matters for stability: 16-gauge steel (about 1/16″ thick) is standard for most wall sculptures, while larger pieces may use 14-gauge or thicker to prevent flexing.
When selecting 3D metal art, consider viewing angle. Pieces with deep relief, 4″ to 8″ projection from the wall, work best on walls where viewers approach from the side, not head-on in narrow hallways. Also check the mounting system. Quality sculptural pieces include welded D-rings or French cleats rated for the weight, not just adhesive strips.
Metal Wall Panels and Geometric Patterns
Metal panels serve dual purposes: art and architectural element. Laser-cut panels with geometric cutouts, hexagons, Moroccan lattice, or mid-century atomic patterns, create visual interest while allowing wall color to peek through. These work especially well as room dividers or to break up large expanses of drywall in open-concept homes.
Corrugated metal panels bring industrial texture. Originally roofing material, 26-gauge galvanized or weathering steel panels (actual dimensions typically 36″ wide) can be cut to size and mounted horizontally or vertically. The ridges catch light and add dimension without the cost of custom metalwork. Pair with reclaimed wood trim for a modern farmhouse look, as seen in many modern design spaces that blend raw materials with refined finishes.
Metal tile mosaics, small squares or rectangles of brushed or hammered metal arranged in grid patterns, offer a modular approach. These install similarly to backsplash tile but don’t require grout, making them a cleaner DIY project. Common sizes are 4″x4″ or 6″x6″ tiles in sets of 10-20 pieces. Mount with construction adhesive or double-sided foam tape rated for the metal’s weight (typically 1-3 lbs per tile).
Choosing the Right Metal Wall Decor for Your Room
Start with the room’s function and existing palette. In living rooms or entryways where metal will serve as a focal point, go bold with size and finish. A 48″x36″ abstract sculpture or multi-panel set draws the eye immediately. In bedrooms or bathrooms, smaller pieces (18″x24″ or under) keep the space feeling restful rather than busy.
Finish selection hinges on undertones already present. Brushed stainless or chrome complements cool grays, blues, and whites. Oil-rubbed bronze or blackened steel pairs with warm earth tones, deep greens, or charcoal. Copper or brass, especially with a natural patina, bridges warm and cool, making it a safe bet for rooms with mixed metal fixtures. Avoid mixing more than three metal finishes in one space: it reads chaotic rather than curated.
Scale matters more with metal than with framed art because the material’s density makes pieces feel heavier visually. A general rule: metal wall art should occupy 60-75% of the width of the furniture below it (sofa, console table, bed). For standalone pieces on blank walls, ensure at least 6-8″ of clearance from the ceiling and 8-12″ from adjacent walls to avoid a cramped look.
Consider acoustics in open-plan homes. Large, flat metal panels can amplify echoes in rooms with hard flooring and minimal soft furnishings. If sound is already an issue, opt for smaller pieces, 3D sculptures that break up sound waves, or combine metal with sound-absorbing materials like fabric panels or area rugs.
Outdoor use requires specific materials. Aluminum and stainless steel (grade 304 or 316) resist rust. Powder-coated finishes designed for exteriors (AAMA 2604 or higher rating) withstand UV and moisture. Avoid bare mild steel or iron outdoors unless it’s intentionally weathering steel (Corten), which forms a protective rust patina over 1-2 years.
DIY Metal Wall Decor Projects You Can Try
For DIYers with basic metalworking tools, creating custom wall decor metal pieces is more accessible than it looks. Here are three approachable projects.
Geometric Metal Grid: Source 1/2″ or 3/4″ square steel tubing from a metal supplier (sold in 8-foot lengths). Cut to size with a metal chop saw or reciprocating saw with a metal blade. Wear safety goggles and gloves: steel edges are sharp. Arrange pieces in a grid or asymmetric pattern, then weld or use corner brackets to join (JB Weld SteelStik works for non-load-bearing decorative joints if welding isn’t an option). Spray paint with metal-specific primer followed by topcoat. Mount to wall studs using 2-3 D-rings screwed into the back of the tubing.
Hammered Copper Panel: Purchase 24-gauge copper sheet (available in 12″x12″ or 24″x36″ sizes at craft or roofing supply stores). Lay the sheet on a sacrificial wood surface. Use a ball-peen hammer to create texture, random strikes for organic look, or stencil a pattern first. Sand edges smooth with 220-grit sandpaper. Apply a clear lacquer spray to preserve the finish or let it patina naturally. Mount with adhesive foam squares rated for 2-3 lbs on smooth walls, or screw small L-brackets to studs for heavier/larger panels.
Upcycled Industrial Gears: Salvage old gears, sprockets, or machine parts from flea markets or industrial surplus stores. Clean thoroughly with degreaser, then arrange on a plywood or metal backer board. Weld or epoxy pieces in place, layering for depth. Leave raw for industrial look or apply a uniform spray finish (Rustoleum Universal works on mixed metals). Attach heavy-duty picture wire or a French cleat to the back for secure mounting. This approach evokes statement-making designs popular in loft and converted warehouse spaces.
Safety note: Always wear hearing protection when cutting metal, a respirator when spraying finishes, and heavy-duty gloves when handling sheet metal or sharp edges. Work in a well-ventilated area or outdoors.
Installation Tips and Best Practices
Proper installation prevents damage to walls and ensures metal pieces stay put. Here’s how to do it right.
Locate Studs First: Metal decor typically weighs 5-30 lbs, depending on size and gauge. For anything over 10 lbs, anchor into wall studs (typically 16″ on center, 24″ in some older homes). Use a stud finder, magnetic models work well since you’re often mounting metal anyway. Mark stud locations with painter’s tape.
Choose the Right Hardware:
- D-rings and screws: For pieces 10-25 lbs, use two D-rings mounted to the back of the metal, aligned with studs. Drive 2-3″ wood screws (at least #8 gauge) through the D-rings into studs.
- French cleats: For panels or heavy sculptures (20+ lbs), a French cleat distributes weight better. Rip a 1×4 at a 45° angle, screw one half to the wall (into studs), and attach the mating half to the back of the metal piece. This also allows for easy leveling adjustments.
- Toggle bolts or wall anchors: If studs aren’t where you need them and the piece is under 15 lbs, use metal toggle bolts (rated 50+ lbs each on 1/2″ drywall) or threaded drywall anchors. Avoid plastic expansion anchors: they fail with metal’s weight over time.
Leveling Matters: Metal’s clean lines make even slight tilts obvious. Use a 4-foot level for pieces wider than 24″. For multi-panel installations, mark a level guideline with a laser level or chalk line before mounting the first piece. Many interior design platforms emphasize that alignment consistency elevates even budget pieces.
Protect Your Walls and Metal:
- Place felt furniture pads or rubber bumpers on the back corners of metal pieces to prevent wall scuffing and allow air circulation (prevents condensation marks on painted drywall).
- For plaster walls, drill pilot holes slightly smaller than screw diameter to prevent cracking.
- On brick or concrete, use a hammer drill with masonry bit and sleeve anchors or Tapcon screws rated for the metal’s weight.
Outdoor Mounting: Use stainless steel screws and washers (grade 304 minimum) to prevent rust staining. Apply a bead of exterior silicone caulk behind mounting brackets to seal out moisture. Check mounts annually: thermal expansion and contraction can loosen fasteners over time.
If the piece vibrates or rattles in wind or from foot traffic, it’s under-secured. Add additional mounting points or upgrade to heavier-duty hardware. Metal wall decor shouldn’t move once properly installed.