Table of Contents
ToggleBlack kitchen cabinets aren’t just a trend, they’re a design move that anchors a space with serious visual weight. Whether someone’s tackling a full remodel or swapping out dated oak boxes, black cabinets shift the entire feel of a kitchen from predictable to purposeful. They work in tight galley layouts and sprawling open-plan spaces alike, offering flexibility that white or wood-tone cabinets can’t always match. But going dark requires thoughtful planning around finishes, lighting, and adjacent materials. Done right, black cabinets ground a kitchen without making it feel like a cave. Done poorly, they swallow light and show every fingerprint. This guide walks through the practical considerations that make black cabinets work.
Key Takeaways
- Black kitchen cabinets anchor modern spaces with visual weight while hiding wear better than lighter finishes, making them a practical choice for high-traffic kitchens.
- Matte finishes on black cabinets minimize fingerprints and are more forgiving than glossy options, though they require degreasing cleaners and more careful maintenance.
- Layered lighting with under-cabinet LED strips, recessed ceiling lights, and pendant fixtures is essential for black kitchen cabinets to prevent the space from feeling dim.
- Pair black cabinets with contrasting countertops and hardware—white quartz for brightness, warm wood tones for softness, and brushed brass or bronze metals for dimension.
- Black kitchen cabinets work across multiple design styles, from modern and industrial to transitional farmhouse, but work best with intentional color coordination in upper cabinets and walls.
- Maintain black cabinets with daily microfiber cloth wipe-downs and pH-neutral cleaners, avoiding abrasive scrubbing and moisture pooling near sinks to prevent surface damage.
Why Black Kitchen Cabinets Are Trending in 2026
Black cabinets have moved from niche statement to mainstream option for a few solid reasons. First, they hide wear better than lighter finishes, no yellowing, no visible grease buildup around handles after a year of cooking. Homeowners looking at resale value appreciate that black reads as intentional design, not dated trend.
The shift toward matte black kitchen cabinets specifically reflects broader material trends seen in fixtures, appliances, and hardware. Matte finishes resist fingerprints and glare, practical concerns in a high-traffic room. Designers also note that black cabinetry pairs easily with both warm and cool palettes, giving flexibility as accent colors or countertop materials change over time.
Another driver: the move away from all-white kitchens. After a decade of white subway tile and Carrara marble, homeowners want contrast and depth. Black delivers that without the maintenance headaches of dark stained wood, which can show water damage and requires periodic refinishing. Painted or laminate black cabinets hold up better in humid environments and near sinks.
Design Styles That Work Best with Black Cabinets
Black cabinets adapt to multiple aesthetics, but they shine in specific design contexts. Modern and contemporary kitchens benefit from the clean lines black provides, especially when paired with minimal hardware or integrated handles. Slab-front doors in black create a seamless look that emphasizes geometry over ornamentation.
Industrial-style kitchens use black cabinets as a natural anchor. Pair them with open metal shelving, exposed ductwork, and concrete countertops for a cohesive warehouse-inspired feel. The key here is balancing raw textures, brushed steel, reclaimed wood, unfinished brick, with the smoothness of painted cabinetry.
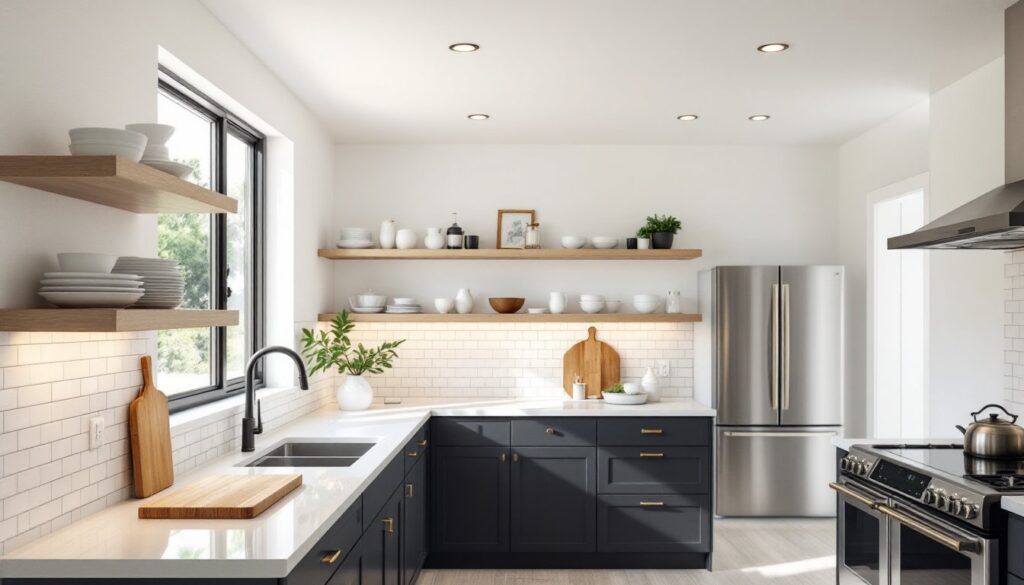
For transitional or modern farmhouse spaces, black cabinets on lower runs with open upper shelving or glass-front uppers prevent the space from feeling too heavy. Shaker-style doors in black work well here, offering subtle detail without fussiness. Add brass or bronze hardware and warm wood tones (butcher block counters, floating shelves) to soften the contrast.
In small kitchen black kitchen cabinets scenarios, the approach shifts. Use black on lower cabinets only, keeping uppers light or eliminating them entirely in favor of open shelving. This grounds the space without shrinking it visually. For kitchen design ideas that maximize limited square footage, consider contrasting black base cabinets with white or light gray walls and ceilings to maintain vertical openness.
Choosing the Right Finish and Hardware for Black Cabinets
The finish makes or breaks black cabinets. A poorly chosen sheen shows every flaw, while the right one elevates the entire kitchen.
Matte vs. Glossy Black Finishes
Matte black finishes absorb light, creating a soft, velvety appearance that minimizes reflections. They’re excellent at hiding fingerprints, minor scratches, and surface imperfections, critical in a kitchen where hands are constantly grabbing doors. Trade-off: matte finishes can be harder to clean. Grease and oil stains may require more scrubbing than on glossy surfaces. Use a degreasing cleaner formulated for flat paint, and test in an inconspicuous spot first.
Glossy or semi-gloss black finishes reflect light, which helps bounce illumination around the room, useful in kitchens with limited natural light. They wipe clean easily, but they’re unforgiving. Every fingerprint, water spot, and dust particle shows. Glossy works best in kitchens where homeowners are committed to daily wipe-downs or in showcase designs where visual drama outweighs maintenance concerns.
Satin finishes split the difference, offering slight sheen without full gloss. They’re the most forgiving option for busy households and still photograph well if resale is a consideration.
Hardware choice matters as much as finish. Brushed brass, aged bronze, or unlacquered brass adds warmth against black and develops a patina over time. Polished nickel or chrome keeps the look crisp and modern. Avoid matte black hardware on matte black cabinets, it creates visual flatness. Contrast in metal finish adds necessary dimension.
Pairing Countertops and Backsplashes with Black Cabinets
Countertop selection sets the tone for a kitchen with black cabinets. White or light-colored quartz (Carrara-style veining, pure white, or soft gray) provides high contrast and brightens the workspace. Quartz is non-porous, resists staining, and requires no sealing, practical for heavy use.
Butcher block or natural wood countertops introduce warmth and texture. The honey tones in maple or the deeper browns in walnut soften black’s intensity. Note that wood requires regular oiling (mineral oil every 4-6 weeks) and isn’t ideal near sinks unless properly sealed with a food-safe waterproof finish.
Concrete countertops work in industrial or modern settings, especially when left unsealed for a raw look or polished to a smooth finish. They’re porous and prone to staining without proper sealing (use a penetrating sealer reapplied annually).
For backsplashes, white subway tile remains a reliable choice, it’s affordable, timeless, and the grout lines add subtle texture. Marble slab or large-format tile eliminates grout lines and creates a seamless, high-end appearance. For those exploring creative kitchen ideas, consider textured tile, zellige, or patterned cement tile to add personality without competing with the cabinets.
Stainless steel or metal tile backsplashes enhance the industrial vibe. They’re durable, heat-resistant behind ranges, and easy to wipe down, though they show water spots and require frequent cleaning.
Lighting Strategies to Brighten a Black Cabinet Kitchen
Black cabinets absorb light, so layered lighting isn’t optional, it’s essential. Relying on a single overhead fixture leaves the space dim and uninviting.
Start with under-cabinet LED strip lighting. Install it along the underside of upper cabinets to illuminate countertops. Look for strips with a color temperature of 3000K-4000K (warm to neutral white) for task lighting that doesn’t feel clinical. Hardwired options offer cleaner aesthetics, but plug-in strips work for renters or DIYers avoiding electrical work. Expect coverage of about 6-8 inches from the cabinet edge.
Recessed ceiling lights (4-inch or 6-inch cans) should be spaced roughly 4 feet apart in a grid pattern, with dedicated lights over work zones, sink, range, and primary prep areas. If retrofitting, IC-rated (insulation contact) housings are required where insulation is present in the ceiling cavity. This is basic National Electrical Code (NEC) compliance: check local amendments.
Pendant lights over islands or peninsulas add both task lighting and visual interest. Hang them 30-36 inches above the countertop for optimal light distribution without blocking sightlines. Choose fixtures with exposed bulbs or light shades to maximize output.
Toe-kick lighting adds subtle ambient glow and makes the cabinets appear to float. It’s optional but effective in creating depth. Use low-voltage LED strips rated for damp locations if the kitchen sees high humidity.
Natural light matters too. If possible, avoid heavy window treatments. Sheer blinds or no coverings at all let maximum daylight in. On north-facing kitchens or those with limited windows, consider adding a skylight or tubular daylighting device, both require roof penetration and flashing, so factor in professional installation costs ($500-$2,000 depending on roof type).
Maintenance and Care Tips for Black Kitchen Cabinets
Black cabinets show dust and water spots more readily than mid-tone finishes, so maintenance routines need adjustment. For daily upkeep, keep a microfiber cloth handy and wipe down doors after cooking, especially around handles and near the range where grease accumulates.
Use a pH-neutral cleaner or a simple mix of warm water and a few drops of dish soap. Avoid abrasive sponges or scouring pads, which scratch the finish. For matte finishes, a dedicated flat-paint cleaner works better than all-purpose sprays that can leave residue or create shiny spots.
Grease buildup is the main enemy. Degreasers formulated for kitchen use (like Krud Kutter or Simple Green) cut through film, but test first in an inconspicuous area. Apply with a soft cloth, let sit for 30 seconds, then wipe clean. Don’t let cleaner pool in door seams or around hardware, it can damage finish or cause swelling in MDF or particleboard cores.
For glossy finishes, streak-free glass cleaner (ammonia-free) works well for quick touch-ups. Spray onto the cloth, not directly onto cabinets, to avoid drips getting into hinge holes.
Hardware needs attention too. Fingerprints on brass or bronze fixtures can be wiped with a soft cloth: unlacquered metals will patina naturally. If someone prefers to maintain the original finish, use a metal polish (like Brasso) sparingly every few months.
Chips or scratches in painted black cabinets are repairable. Touch-up kits from the cabinet manufacturer are ideal, but in a pinch, a small artist’s brush and matching black paint (test the sheen, matte, satin, or gloss) can cover minor damage. For deeper gouges in wood or MDF, fill with wood filler, sand smooth with 220-grit paper, prime, and paint.
Avoid steam and prolonged moisture exposure near dishwashers and sinks. Wipe up standing water immediately to prevent damage to cabinet boxes, which are often MDF or plywood and can swell or delaminate if saturated.