Table of Contents
ToggleIf you’ve just installed a new dishwasher or moved into a place with one, the control panel can look more complicated than it needs to be. The good news? Learning how to use a dishwasher properly takes about 15 minutes, and once you’ve got the system down, you’ll save hours of handwashing every week. This guide walks through everything from prep work to cycle selection, plus the mistakes that leave dishes spotty or still dirty. Most dishwasher problems aren’t machine failures, they’re loading errors, wrong detergent choices, or skipped maintenance steps that take less than five minutes to fix.
Key Takeaways
- Scrape rather than rinse dishes before loading, as modern dishwasher sensors detect soil levels and adjust cycles—pre-rinsing can actually cut the wash short and leave detergent residue.
- Load dishes strategically with faces and interiors angled toward the center spray arms, leaving proper spacing so water and detergent reach all surfaces effectively.
- Use only dedicated dishwasher detergent in the main cup, fill the rinse aid dispenser monthly, and adjust doses based on water hardness to avoid spotty or filmy results.
- Select the appropriate wash cycle for your load—Normal for everyday dishes, Heavy for baked-on food, Quick for lightly soiled items, and Sanitize to kill bacteria on cutting boards and baby bottles.
- Clean the filter monthly, wipe door seals regularly, and run a cleaning cycle every 1–3 months with white vinegar or a cleaner tablet to maintain dishwasher performance and prevent odors.
- Avoid common mistakes like overloading, blocking spray arms, using dish soap instead of detergent, and ignoring hard water issues, which together account for most dishwasher cleaning failures.
Preparing Your Dishes for the Dishwasher
Scrape, don’t rinse. Modern dishwashers, especially those built after 2010, have sensors that detect soil levels and adjust water and cycle time accordingly. If dishes are pre-rinsed until they’re spotless, the sensor may cut the cycle short, leaving detergent residue on glassware.
Use a silicone spatula or paper towel to scrape off large food particles: bones, pasta, leafy greens, and anything that could clog the filter screen at the bottom of the tub. Leave a thin film of grease or sauce, the enzymes in dishwasher detergent are formulated to break down proteins and fats during the wash cycle.
Remove non-dishwasher-safe items. Cast iron, wooden cutting boards, non-stick cookware (unless labeled dishwasher-safe), anything with gold or silver trim, and thin plastics that can warp should be handwashed. Check manufacturer labels if you’re unsure.
Give stuck-on food a soak before loading. A five-minute soak in warm water loosens baked-on cheese or oatmeal better than running a heavy cycle on an overloaded rack. Don’t let food dry and harden for more than a few hours, once it bonds to the surface, even a dishwasher struggles.
Loading Your Dishwasher the Right Way
How you load a dishwasher affects both cleaning power and how long the machine lasts. Improper loading blocks spray arms, traps food particles, and can crack delicate glassware.
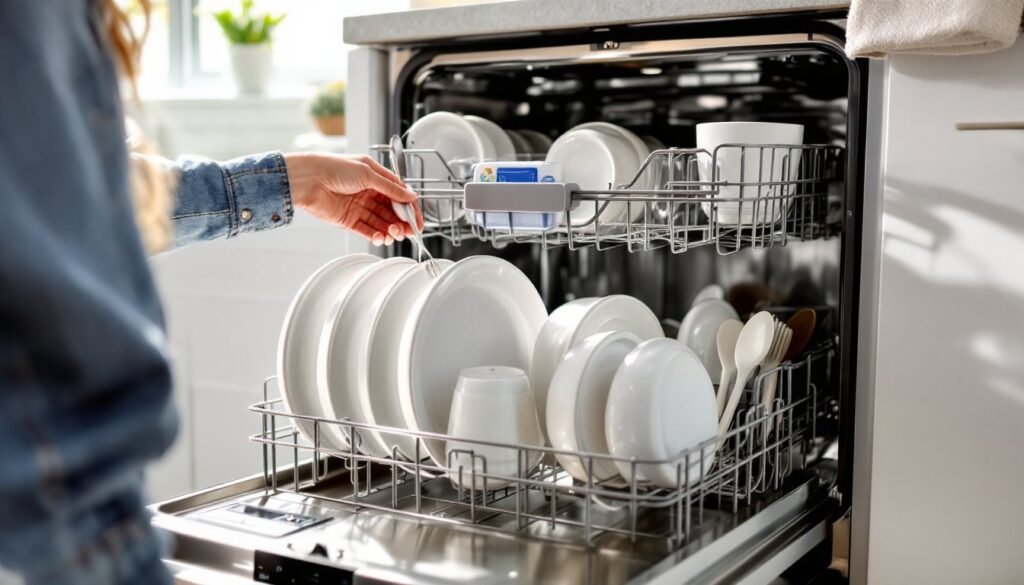
Face everything toward the center and down. Spray arms rotate from the center of the tub, shooting water upward and outward. Plate faces and bowl interiors should angle toward the spray arms, not toward the walls. Bowls loaded upside-down on the top rack will fill with dirty water instead of draining.
Leave space between items. Water needs to reach every surface. Nesting bowls or overlapping plates creates pockets where detergent can’t penetrate. If you have to force something in, the load is too tight.
Avoid blocking the detergent dispenser. The dispenser door, usually on the inside of the main door, needs to swing open freely during the cycle. A large cutting board or baking sheet leaned against it will prevent detergent from releasing, leaving you with a load washed in plain water.
Check that the spray arms can spin. Before you turn on the dishwasher, give each spray arm a manual spin. If something is blocking rotation, usually a spatula handle or tall item on the bottom rack, reposition it. A jammed spray arm cuts cleaning efficiency in half.
Top Rack vs. Bottom Rack: What Goes Where
The bottom rack handles the heavy-duty items: plates, pots, pans, serving dishes, and anything with caked-on food. Water pressure is strongest here, and the tines (the vertical posts that hold items in place) are spaced wider to fit larger pieces. Load plates between tines, not resting flat on the rack floor.
The top rack is for lighter, more delicate items: glasses, mugs, small bowls, plastic containers (top rack only, bottom rack heat can warp them), and anything that could be damaged by high heat or strong spray. Many top racks have fold-down tines or adjustable sections for stemware.
Silverware basket or third rack? If your dishwasher has a third rack (a shallow tray at the very top), load flatware horizontally with handles facing the same direction. If you’re using a basket, mix up the orientation, some forks up, some down, so they don’t nest together and block water flow. Place knives blade-down for safety. Keep stainless and silver-plated pieces separated: contact between dissimilar metals during a hot wash can cause pitting.
Adding Detergent and Rinse Aid
Use the right detergent type. Dishwasher detergent comes in powder, gel, tablets, and pods. Pods and tablets are pre-measured and convenient, but powder gives you control over dosing for smaller or lightly soiled loads. Gel dissolves faster in short cycles but may leave residue in hard water areas.
Never use dish soap meant for handwashing, it creates suds that overflow the tub, flood the kitchen floor, and can damage the pump. Experts at Good Housekeeping note that using the wrong soap is one of the most common dishwasher mistakes.
Fill the main detergent cup, not the pre-wash cup. Most dishwashers have two compartments in the dispenser door: a larger main cup and a smaller pre-wash cup. For normal loads, only fill the main cup. The pre-wash compartment is for heavily soiled loads or pots and pans cycles, it releases detergent during a pre-rinse phase before the main wash.
Start with the manufacturer’s recommended dose, then adjust. If you have soft water (below 3 grains per gallon hardness), you can often use less detergent. Hard water (above 10 grains per gallon) may require a full dose or a detergent booster.
Don’t skip rinse aid. The rinse aid dispenser is a small reservoir next to the detergent compartment. Rinse aid reduces surface tension, helping water sheet off dishes instead of forming droplets that leave spots and streaks. Fill it once every month or two, most dispensers have a window so you can see the level. Set the dispenser dial to 3 or 4 to start: increase it if you see spotting, decrease if dishes feel filmy.
Selecting the Best Wash Cycle for Your Load
Modern dishwashers offer half a dozen cycles or more. Here’s when to use each one.
Normal or Auto: The default for everyday loads with light to moderate soil. Auto-sensing models adjust water temperature, cycle length, and spray intensity based on how dirty the water gets during the wash. Runs 1.5 to 2.5 hours depending on soil level.
Heavy or Pots & Pans: Hotter water (140–160°F), longer wash time, and stronger spray pressure for casserole dishes, baking sheets, and anything with baked-on or greasy residue. Runs 2.5 to 4 hours. Uses more energy and water, reserve it for loads that need it.
Quick or Express: A short cycle (30–60 minutes) for lightly soiled dishes that were just used. Not suitable for dried-on food. Water temperature may not exceed 120°F, so sanitization isn’t guaranteed.
Eco or Energy Saver: Extends wash time but lowers water temperature to reduce energy use. Can take 3+ hours. Good for overnight runs when you’re not in a hurry and want to cut utility costs.
Sanitize or High-Temp: Raises final rinse temperature to 150°F or higher to kill bacteria. Certified sanitize cycles meet NSF/ANSI Standard 184, reducing bacteria by 99.999%. Useful for baby bottles, cutting boards used for raw meat, or during flu season.
Rinse or Rinse & Hold: Not a full wash, just a rinse to prevent food from hardening while you wait for a full load. Uses minimal water and no detergent.
Check your owner’s manual for cycle details specific to your model. Cycle names and functions vary by brand.
Running and Maintaining Your Dishwasher
To turn on the dishwasher, close the door until it latches, select your cycle, press Start, and walk away. Most models beep or display a countdown timer. If you need to add a forgotten item mid-cycle, wait a few seconds after opening the door to let steam escape, then load the item and re-close the door, it should resume automatically.
Once the cycle finishes, crack the door open and let dishes air-dry for 10–15 minutes. Plastic items on the top rack may still be damp (plastic doesn’t retain heat like ceramic or glass, so water doesn’t evaporate as fast). Either towel-dry them or leave the door propped open overnight.
Clean the filter monthly. The filter is at the bottom of the tub, usually under the lower spray arm. Twist or lift it out (consult your manual for the release mechanism), rinse under hot water, scrub with a soft brush to remove trapped particles, and reinstall. A clogged filter reduces spray pressure and leaves food particles on clean dishes.
Wipe door seals and edges. Food and grime collect in the rubber gasket around the door and along the bottom edge where water pools. Wipe them down with a damp cloth every few weeks to prevent mold and odors.
Run a cleaning cycle every 1–3 months. Empty the dishwasher, place a dishwasher cleaner tablet or cup of white vinegar on the top rack, and run a hot cycle. This breaks down grease buildup, clears mineral deposits from hard water, and freshens the interior. Many smart models even remind you when it’s time, as noted in reviews on Digital Trends.
Check spray arm holes. If you notice reduced cleaning performance, remove the spray arms (they usually twist off) and inspect the holes for clogs. Use a toothpick or small wire to clear any buildup.
Common Dishwasher Mistakes to Avoid
Pre-rinsing too much. As mentioned earlier, sensors need some soil to calibrate. Over-rinsing can actually lead to poor results.
Overloading. Cramming in one more plate might seem efficient, but it blocks water flow and guarantees a second wash. Run two properly loaded cycles instead of one jammed load.
Using too much or too little detergent. More isn’t better. Excess detergent leaves a cloudy film on glassware. Too little won’t clean effectively. Follow the dose guidelines on the package and adjust for water hardness.
Blocking the spray arms. Tall items, especially cutting boards and baking sheets, should go along the sides or back, not in the center where they interfere with arm rotation.
Ignoring hard water. If your area has hard water (above 7 grains per gallon), consider adding a water softener or using a detergent with built-in softeners. Hard water leaves white film and reduces detergent effectiveness. Local water reports are available from your utility provider.
Not running hot water first. Dishwashers pull water from your home’s hot water line. If the kitchen sink is far from the water heater, the first water into the dishwasher may be lukewarm. Run the kitchen tap until water is hot before starting a cycle, it ensures the dishwasher starts with properly heated water for better cleaning and dissolving detergent.
Using the dishwasher as storage. Dirty dishes left in a closed dishwasher for days develop odors and attract pests. If you’re collecting a full load over time, use the rinse cycle daily or leave the door slightly ajar to allow airflow.
For more kitchen efficiency tips and appliance advice, check out resources on The Kitchn.